Wednesday, 28 November 2012

A tale of two pies

I like Autumn lots.  Mainly because it's a season which facilitates the making (and eating) of stews and pies.  I've been a bit pie obsessed recently and here are two of my favourites

Lamb Shank Pie.

This is genuinely an amazing pie.  You will need the following.

  • 6 lamb shanks
  • plain flour
  • 4 red onions
  • 8 cloves of garlic
  • 1 bottle of red wine - I do love a recipe that calls for a WHOLE bottle of wine.
  • 1/2 pint beef stock
  • rosemary finely chopped
  • 3 tbsp redcurrant jelly (I used cranberry jelly because it was what I had in the fridge)
  • Salt and pepper
  • Puff Pastry -  let's face it, no one really makes their own.
Roll the lamb shanks in seasoned flour and brown in hot oil in a heavy bottomed pan.  Quarter the onions and add to the pan with the garlic. Saute lightly, then add the rest of the ingredients.

Leave to simmer for two hours, or until the meat turns tender and falls off the bone.  Remove the bones and cover  with the pastry.  Take three of the lamb shank bones and use them to as pie funnels.

Brush the pastry with egg yolk and slice in a diamond pattern.  Bake for 35 minutes in a preheated oven at 180.


Unfortunately I only have a picture of this before it went in the oven, as I had some friends over for dinner and it was wolfed down the second it came out.  It was delicious though and I can highly recommend it.

Which is slightly better than the second pie, where I didn't take a picture at all.  But it is one of my favourite pies and therefore worth talking about.

It's a vegetarian dish, which is highly unusual for me.

Heidi Pie

To make this, you will require the following

  • Butternut squash
  • rosemary
  • olive oil
  • 400g tinned tomatoes
  • 2 cloves garlic
  • 2 finger chillies
  • 150g soft goats cheese
  • bag of washed spinach
  • puff pastry - see earlier comments about making your own
Peel and core the squash and cut into chunks, coat with oil and scatter with rosemary.  Roast until soft.

Chop the garlic and fry in heated oil, add the chopped seeded chillies and fry until golden; add the tomatoes and bring to the boil then reduce the heat.

Blanche the spinach in boiling water and then shake off the excess water.  Slice the spinach.

Combine the tomatoes, spinach, butternut squash and goats cheese in a pie dish.  Cover with pastry, brush with egg yolk and cut a diamond pattern on.  Then bake in a preheated oven at 180 degrees for 35 minutes.

The result is a beautifully vibrant, colourful, tasty pie.

Wednesday, 31 October 2012

Bristol Zombie Walk 2012

The perfect post for Halloween.  Besides I'm still ill in bed, so I need something other than whinging that my skin hurts and e-mailing suggested SLAs to the office to keep me busy in the spare ten minutes that I've actually been awake so far today.

At the weekend it was the Bristol Zombie Walk and I had such a good time last year (if you ignored the fractured radial head that is) that there was no way I was missing it this time round.  After all who doesn't want to dress up as a member of the undead and lurch through a city centre, senselessly scaring innocent passersby?


This look is actually fairly simple to create with some basic makeup, acrylic paint and PVA glue.


Start with a base coat of white face makeup, then blend red, green, yellow, black and purple eyeshadows around your eyes to create a sunken, bruised effect. 

Next up are the scars.  Take some tissue paper and roll it into long thin strips.  Soak these in the PVA glue and attach them to your face.  PVA glue is non toxic, but it will hurt (a bit like taking off a plaster) when you want to remove them. Once the glue has dried, take the acrylic paints and using reds and browns, paint over the tissue strips. 

Then take the fake blood and carefully dribble it along the painted tissue strips and swish some around your mouth as well.  I finished mine off with some all black contacts for a full on dead eyed look.

The rest of the makeup was amazing.  So many people put huge amounts of effort in.

Tuesday, 30 October 2012

The Secret Project

Otherwise known as "That time Charlie got me drunk and asked me to make her wedding cake".


After the last time, when Merryn and I agreed to make Clair's wedding cake and ended up having to make a metric ton of custard by hand, I swore I would never do this again.

Sure Clair's cake looked pretty when it was done, but we nearly killed ourselves and each other in the process.

 But look how beautiful Charlie and Simon are.  And did I mention that they're two of my very favourite people?  And that it was totally the best wedding I'd been to yet this year?  

I don't think I would have agreed to do this for any one else.  And I'm really not joking when I say - I will never do this again.

Charlie and I plotted to produce a massive rainbow wedding cake.  The general idea was that it would look like a traditional wedding cake from the outside, but when they cut into it the cake would be a rainbow inside.

Of course, when I started thinking about it, I realised that this would actually involve me baking twelve separate cakes.  So I did.  I baked each evening that I was home for about two months.  And froze them obviously.  The freezer was actually pretty much off limits to everyone during that time.  I used a 4, 8, 8, 8 mix for all of the bottom layers and a 2, 4, 4, 4 mix for all of the top layers.  I used a splash more milk than usual in batter to make it spread out smoothly seeing as they were such thin layers and I also used gel colourants.  These are a bit more expensive, but they do produce really bright amazing colours.

That basically means that Charlie's wedding cake had 36 eggs, 72 oz of butter, 72 oz of sugar, 72 oz of plain flour, 12 tspns of baking powder and a pint of milk in it before I had even started icing.  To say this thing was huge is an understatement and a half.  The idea of icing something that big was really starting to wake me up in the middle of the night.  So I did what every sensible woman in their thirties does when faced with a problem of this nature.

I called my mother and asked her to help me.

She very generously came to stay.  We agreed up front that no matter what went wrong in execution of this plan, we were only going to say positive things about the cake.  An agreement I was very grateful for later on.

And everything was going smoothly to start with.  The layers of cake were stacked up with a thin layer of lemon curd between each one to help stick them together.  The cakes were placed on a thin board each which was cut to size.

You can see where I trimmed down the edges of the cake to make them as straight as possible.  This kind of worked.

The cakes were coated with a thin layer of butter icing, to help the royal icing move once we had the rolled out sheet of icing on the cakes.  This should also help cover up any imperfections in the cake.

You can see in the background of this picture what five kilos of icing looks like. Incase you ever needed to know such a thing.

One butter iced, both of the cakes were popped in the fridge so they could harden up a bit before we started icing them properly.

Once the butter icing had hardened, we iced the cakes with some good old fashioned team work.  My mother turning the icing for me as I rolled it out.

On the larger cake we had to employ what I intend to patten as "The pizza base icing technique", which involved me rolling the sheet of icing over my arm in the style of an Italian chef, before flinging it at the cake.

Then, to be truthful, we got a bit complacent.  The cakes were popped in the fridge to harden so the icing could be properly smoothed and we went shoe shopping.  And that's were things went a little bit wrong.

What I didn't know, what all my reading about this on the internet hadn't disclosed to me, was this FONDANT ICING SHOULD NOT BE PUT IN THE FRIDGE.  *ahem*  If you put fondant icing in the fridge it will do what is called "Sweating".  Sounds revolting doesn't it?  It means the icing will take on a wet, shiny, sticky hue. 

So I took the cakes out of the fridge and left them over night to dry.  Which didn't work.  Then I took a hairdryer to the cakes, which didn't work (look the internet told me to do it, and one day when I have forgotten how stressful this was I might tell Charlie the story of how I was stood barefoot and hungover at six in the morning hairdrying her cakes with a mildly manic look on my face) so then I took the last advice I could find on the internet which was to sieve icing sugar onto the cake  and pat it down.  And fortunately this worked just fine and the icing dried out.

Unsurprisingly I was far too scared to try and smooth the icing.  Or actually touch it, or breathe in the same room as it.  So instead I just decorated them as they stood.

The bottom cake had six plastic dowels pushed through the icing to support the weight of the top cake.  Sponge cake does not have the tensile strength required to hold up a cake that size and without the dowling the bottom cake would have collapsed.

Both cakes had ribbons iced onto them, using left over butter icing and then my lovely and talented mother crafted a large bow for the top of the cake, while I fashioned two interlocking glow in the dark hearts to nestle in the bow out of some every day items which most people have lying around the house.  Most people who like raving in heart shaped glasses with glow sticks.  I don't so actually do that sort of thing anymore, so I'd bought these off the internet specially.

The cake was transported in two pieces (which is a whole other stressful story) and assembled on site, with the caterers clipping the glow sticks in right before the evening do started.  At this point I think I was lucky that my boyfriend and best friend were still talking to me. 

When it was done, it really looked rather good.  If you ignore the slightly rustic icing.


So to make one of these babies of your very own you will require the following

  • 36 eggs
  • 72 oz butter unsalted
  • 72 oz caster sugar
  • 77 oz plain flour
  • 12 tsp baking power
  • 6 gel colourants
  • 1 pint milk
  • 5 kilos of fondant icing
  • 3 jars of lemon curd
  • 1 kilo of icing sugar (to dust when rolling and for when things go wrong)
  • The world's most understanding mother.
  • The knowledge that fondant icing does not go anywhere near the fridge.  Really.

Things that I now apparently need to own.

I've been off work sick today so I've been rampaging around the internet (interspersed with some light napping and whinging that I'm going to die) and now I have a list of things a mile long that I need to own.

Let's start off with this little beauty.  There is nothing in life that I like more than a good comedy scarf.


And this one ticks all the requisite boxes.  It's two tone, will go with pretty much all my outfits and who doesn't love a stupid moustache*?

Then, there's these which I love beyond measure.  I adore the idea of hiding a gun under my pillow.

 Did I mention that they're organic and fair trade AND will go with my existing bedding.  It's like the universe is trying to make me shop.

Then I found these ebony and silver stacking rings.

I've been looking for some stacking rings for a while and I keep coming back to this set.  Really so cute.  But after that I got caught in a bit a ring loop. 

With a freshwater pearl and hand beaten silver offering


And then this fun resin one which has a dandelion set inside it.


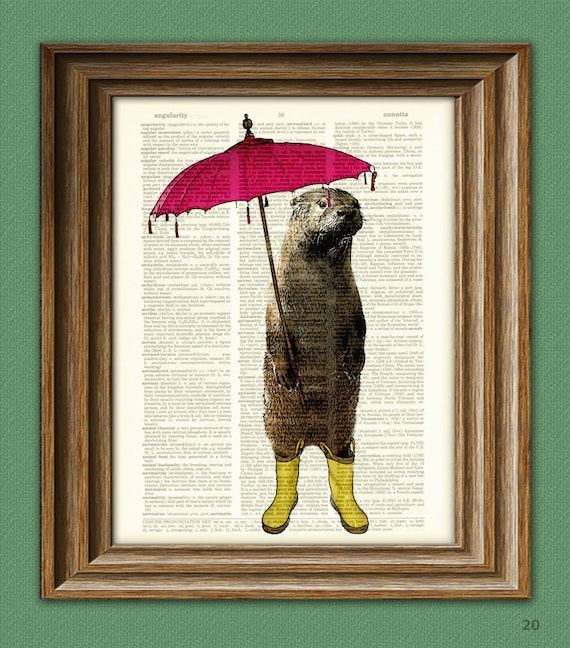
In a conscious effort to drag myself away from rings, I started looking a pictures for my picture wall and found this rainy day otter.


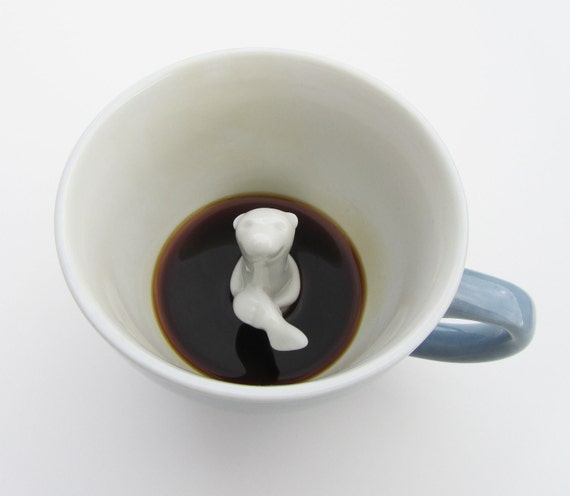
Is it too twee?  I'm really not sure.  But then I found THIS, it's got an otter inside of it!  Rising from a sea of coffee!  I think my life might actually be complete!  I think that I might have used up an entire allowance of exclamation marks in one go!


I have to confess that things rather went downhill from there as I was sucked into an endless loop of otter based tat.  When I seriously found myself trying to appreciate an abstract, badly molded otter pendant that was being sold as a Patronius Otter inspired by Harry Potter I decided to give up for the day. 

But not before I bought the world's best present for my nephew who will be turning one in the next couple of weeks.  Oh and I might have bought myself the scarf as well


*on scarfs obviously.  When they're actually on boyfriend's faces they're entirely less entertaining,

Saturday, 29 September 2012

Important Meals

It's been a while since I've updated this blog.  Not, I might add, because I've stopped making things.  I've been working on a really big project, but sadly it's top secret.  Yes, I'm rolling my eyes at myself so you can do it too.  Actually it really is top secret, and more importantly it's not my secret so I can't write about it - yet.  I'll show you what I've been doing next month.  Probably some time after the 13th....

Anyway, I had a night off the big project and I had promised that I would make dessert for an important dinner on Sunday night with the lovely Charlie and Simon.  I wanted to make something a little bit different.  Charlie requested something light and chocolate is off the menu because of allergies.

One of my lovely friends on Urban 75 had been posting about making possets recently.  They sounded delicious and as a side note I learnt that posset is also used to refer to baby sick.  Nice.  But don't let that put you off the pudding.

I found an awesome looking recipe from Nigel Slater on the Guardian website

Lemon Posset
Makes 4 small glasses.

Ignore the large glass of gin
500ml double cream
150g caster sugar
75ml lemon juice

Put the cream and caster sugar in a saucepan and bring to the boil, stirring occasionally to dissolve the sugar.


Reduce the heat so that the mixture doesn't boil over, and let it bubble enthusiastically for about 3 minutes, stirring regularly.
Remove from the heat, stir in the lemon juice and leave to settle. Pour into four small wine glasses or cups and leave to cool. Refrigerate for a couple of hours before serving.


I served mine in ramekins rather than glasses, as I figured they would be easier to transport that way and garnished them with a curl of lime.


I needed to make something to serve them with so I decided to experiment with making some brandy snaps.  How hard could this possibly be after all.  The sort of phrase that usually gets me into trouble. 


But I found a really good (and by that I mean simple) looking recipe on the trusty BBC Good Food recipe.


Brandy Snaps

55g butter
55g demerara sugar
55g golden syrup
50g plain flour
1/2 tsp ground ginger
1/2 tsp lemon juice

  1.  Preheat the oven to 180C/350F/Gas 4. Line two baking trays with baking parchment then oil a thickish handle of a wooden spoon and lay it on a cooling rack
  2.  Measure the butter, sugar and syrup into a small, heavy-based pan.
  3. Heat gently until the butter has melted and the sugar has dissolved. This will take about 15 minutes over a low heat. Don’t let the mixture boil as it may crystallise
  4.  Leave the mixture to cool slightly, about 2-3 minutes, then sieve in the flour and ginger. Pour in the lemon juice and stir well to mix thoroughly. Drop four teaspoonfuls of the mixture onto each of the prepared baking trays to make neat circles, about 10cm/4in apart.
  5. Bake in the pre-heated oven for about 10-15 minutes really not true.  8 minutes tops.  You can see what happened to the 15 minute baked versions in the photos below, or until the mixture is well spread out, looks lacey and is a dark golden colour. Once baked, you need to work fast to shape the brandy snaps, so its easier if you bake one tray at a time. Not actually true.  If you put each tray in as it's ready, you've just about finished with the first by the time the second is ready.
  6.  Remove each tray from the oven and leave for a minute or so to firm up slightly, then lift from the baking parchment using a fish slice. The mixture needs to be just firm enough to remove, but pliable enough to shape And you need to have fingers made of asbestos.  Seriously this stuff is HOT and has about a three minute window in which you can work with it before it needs to go back in the oven
  7. Quickly roll a circle of the warm mixture around the handle of the wooden spoon, having the  join underneath. Press the join lightly together to seal, then slide the brandy snap off the spoon and leave it to firm up on the wire rack, again with the join underneath.
  8. If any of the circles on the sheet harden too much to work with, put them back in the oven for a few seconds to soften again. Repeat until all the mixture has been used. If the mixture in the pan becomes too firm to drop in neat spoonfuls, roll a teaspoonful of it into a small smooth ball in your hands, sit it on the baking tray and flatten slightly with your fingers. When cold, store the brandy snaps in an airtight tin or container; they will keep for at least a week. 
And do you know what - they worked really well.  They were a bit fiddly to make but they taste delicious.

See what I mean about the 15 minute versions?


I'm confident that I've fulfilled the brief and that my contribution to dinner will live up to Charlie's high standards.  Oh and as to why the dinner is important?  It just is.

Saturday, 30 June 2012

Nervous Cows

The literal translation of this dish - Luc Lac - is shaking beef, which always makes me think of a herd of cows panicking in a corner.  It's delicious though, and as I'm trying to eat more protein at the minute is becoming something of a favourite.

The really important about this dish is that you use the best quality beef that you can get your hands on.  It makes such a difference.  I use a cubed  Aberdeen Angus organic beef from my lovely butcher.


  • 400g cubed beef
  • 1tbsp oyster sauce
  • 2tbsp soy sauce
  • 4 cloves of garlic crushed
  • large piece of ginger crushed
  • black pepper
  • chopped onion
Combine all the ingrediants apart from the garlic and leave to marinade.  This should be left for atleast 30 minutes, but I prefer to marinade overnight if at all possible.

Cook the garlic gently until golden brown, add the marinaded meat and cook over a high heat. The meat should be a little bit rare, so don't over cook. Serve on a bed of corriander.


Sunday, 24 June 2012

Death Row

Apparently there's loads of different traditions when it comes to final meals.  In America inmates on death row are not allowed to ask for alcohol with their final meal, but in France historically the condemned man was given a last glass of rum, but no final meal as they were usually told of their impending doom minutes before being introduced to the guillotine.  In the States these days it's now euphemistically called a "special meal" and is provided a couple of days before the execution.

Ted Bundy apparently declined a special meal, so he was given the traditional steak (medium-rare), eggs (over-easy), hash browns, toast, milk, coffee, juice, butter, and jelly.

Interestingly steak would also be my final meal.  Or more specifically teriyaki steak.

The Marinade
  • Juice of 4 lemons
  • 4 tablespoons of dark soy sauce
  • 4 tablespoons of brown sugar
  • 6 cloves of garlic (crushed)
  • large chunk of ginger (grated)
  • slug of olive oil
  • ground pepper/pinch salt

Go to the butcher and get really thick cut rump steak.  Make up the marinade, tasting as you go.  Marinade the meat for four days.  Yes, really - four days.  Minimum.

Cook on a really hot griddle pan, searing on both side and then serve sliced into ribbons.

I love this with fresh peppery salad or asparagus.


And that would be my final meal.  More interesting of course, is the story of how I end up on Death Row in the first place.....